Supply and Demand Zones in Professional Trading
Imbalance (supply versus demand) causes the price to change in the world’s financial markets. Prices are pushed up when buying pressure is greater than selling pressure; when selling pressure is greater than buying pressure, prices go down. Trading based off of this very simple concept forms the foundation for the whole principle behind supply and demand trading.
Due to these areas highlighting previous areas of substantial institutional buying or selling, price moves from one supply/demand area to the next.
In this supply and demand trading guide, you will gain insight into how supply and demand zones work, how they are determined by traders, and how they can be utilized by professional traders for effective entry and exit strategies as well as as a tool for general market analysis.
What Are Supply and Demand Zones in Trading?
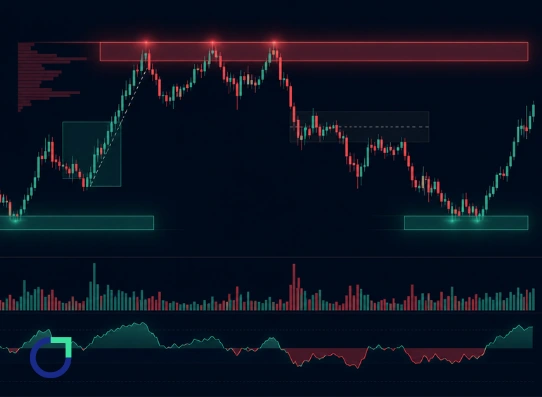
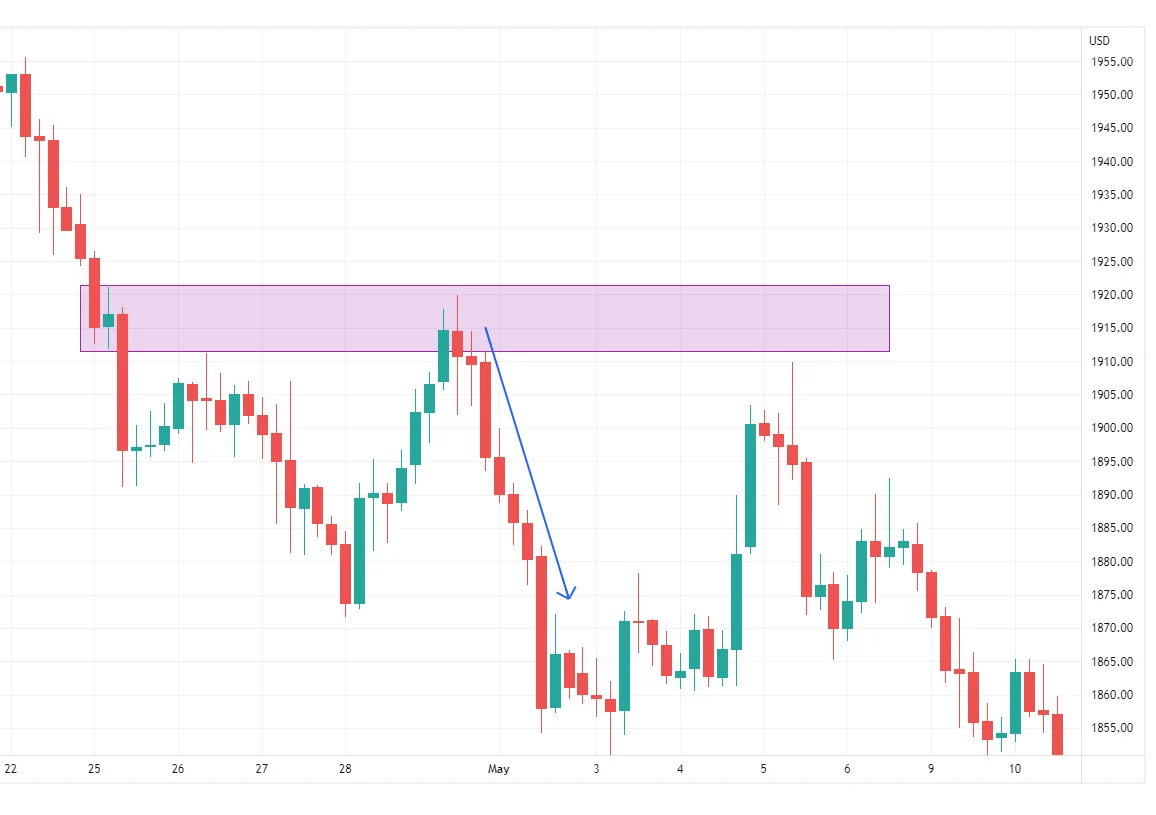
Supply and demand zones are areas on a chart where strong buying or selling previously caused aggressive price movement. These zones often become important because price may react there again in the future.
A demand zone forms when buyers push price upward strongly. A supply zone forms when sellers drive price downward aggressively.
Professional traders usually treat these as zones instead of exact price lines because markets rarely reverse at one perfect level.
Why These Zones Matter
Markets move because of imbalance.
When demand becomes stronger than supply, price rises. When supply becomes stronger than demand, price falls.
This is why traders pay attention to areas where strong momentum previously started.
For example:
- aggressive bullish movement may create a demand zone
- sharp bearish movement may create a supply zone
This is one reason supply and demand zones in trading are widely used across forex, stocks, crypto, and futures markets.
Supply and Demand vs Support and Resistance
Many beginners confuse supply and demand with traditional support and resistance.
Supply and demand trading focuses more on:
- imbalance
- momentum
- institutional activity
- aggressive price departure
rather than only horizontal reactions.
Institutional Activity
Professional traders believe many strong zones are linked to institutional orders.
Large institutions cannot always enter full positions instantly. Because of this, price sometimes revisits important areas where strong buying or selling previously occurred.
This idea is closely related to smart money order blocks and institutional market behavior.
Some traders also study what is order block because both concepts focus on areas where large market participants may have entered the market aggressively.
Strong Zones Usually Show Momentum
Professional traders often look for:
- strong candles
- explosive movement
- fast breakouts
- quick price departure
The stronger the departure from the zone, the more attention traders usually give to it.
Higher Timeframes Matter More
Supply and demand zones appear on all timeframes, but higher timeframe zones usually carry more importance because they reflect larger market participation.
Many traders combine:
- higher timeframe zones for direction
- lower timeframe charts for entries
to improve trade precision.
Why Traders Prefer Supply and Demand Analysis
Many traders prefer supply and demand analysis because it simplifies charts and focuses more on price behavior than excessive indicators.
Some traders also combine supply and demand analysis with brokers and execution environments like otetmarkets when refining their overall trading performance.
How Supply and Demand Work in Financial Markets
Financial markets move because buyers and sellers constantly compete with each other.
When buyers dominate, price rises. When sellers dominate, price falls.
This imbalance creates the foundation of supply and demand trading strategy concepts.
Institutions Move Markets
Retail traders alone rarely create major price movement.
Large banks, hedge funds, and institutions place massive orders, and this activity often creates strong supply or demand zones.
Because institutions cannot always fill all positions instantly, markets sometimes revisit these important areas later.
Market Psychology
Supply and demand also reflect trader psychology.
For example:
- traders who missed bullish moves may buy near demand zones
- trapped traders may sell near supply zones
This psychological behavior often strengthens market reactions.
Strong Moves Leave Clues
Professional traders often search for:
- large momentum candles
- sharp reversals
- fast breakouts
- explosive movement
because these clues may reveal strong imbalance between buyers and sellers.
Supply and Demand Work Across Markets
Supply and demand principles work in:
- forex
- stocks
- crypto
- commodities
- futures
This is one reason many traders prefer this style of market analysis.
Why Supply and Demand Zones Are Important in Professional Trading
Professional traders focus on supply and demand zones because these areas often reveal where strong buying or selling previously entered the market.
These zones help traders:
- identify high-probability setups
- improve risk-to-reward ratios
- avoid emotional entries
- understand market structure better
Entering near important zones often allows traders to use tighter stop losses and more structured trade planning.
Many traders also combine supply and demand analysis with concepts like smart money order blocks to better understand institutional market behavior.
Another major advantage is patience. Instead of chasing price emotionally, traders wait for price to revisit important zones before making decisions.
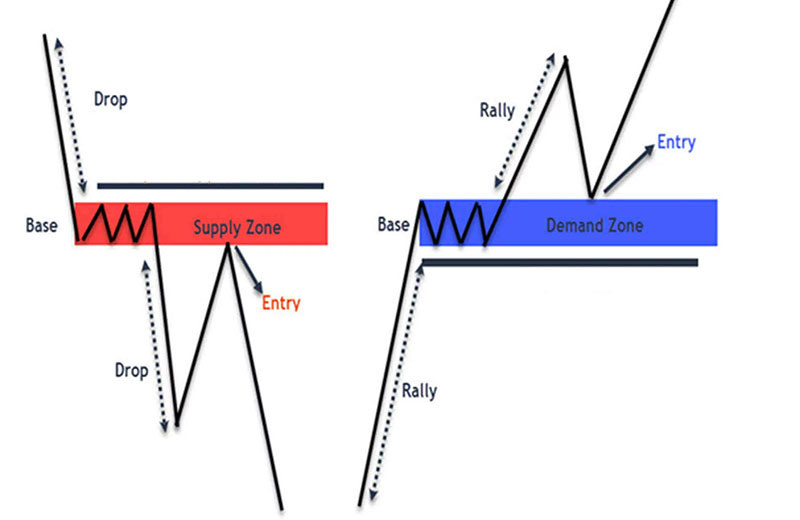
How to Identify Supply and Demand Zones
Identifying supply and demand zones starts with finding areas where price moved aggressively after a short pause or consolidation.
Professional traders usually look for:
- strong bullish or bearish candles
- explosive momentum
- sharp reversals
- fast breakouts
A demand zone forms before strong bullish movement, while a supply zone forms before aggressive bearish movement.
Strong Departure Matters
The stronger the move away from the zone, the stronger the zone is usually considered.
Professional traders prefer zones with:
- large candles
- strong momentum
- minimal hesitation
Weak or slow reactions often create weaker zones.
Fresh Zones
Fresh zones are areas price has not revisited multiple times.
Many traders prefer fresh zones because repeated retests may weaken buying or selling pressure over time.
Confirmation Improves Accuracy
Experienced traders rarely enter blindly.
They often wait for:
- rejection candles
- momentum shifts
- market structure confirmation
- trend alignment
before entering positions.
Types of Supply and Demand Zones
Not all zones are equally strong. Professional traders usually classify zones based on price behavior and momentum.
Reversal Zones
Reversal zones appear when price changes direction aggressively.
For example:
- strong bullish movement after a downtrend creates a demand reversal zone
- strong bearish movement after an uptrend creates a supply reversal zone
Continuation Zones
Continuation zones form during trending markets.
Price pauses briefly before continuing in the same direction.
Fresh Zones
Fresh zones are areas price has not revisited after the initial move away.
Many traders prefer fresh zones because they may still contain stronger institutional activity.
Weak vs Strong Zones
Strong zones usually show:
- explosive movement
- large candles
- quick price departure
Weak zones often show:
- slow movement
- hesitation
- unclear momentum
| Main Characteristic | Zone Type |
| Strong trend change | Reversal Zone |
| Trend continuation | Continuation Zone |
| Untested price area | Fresh Zone |
| Aggressive momentum | Strong Zone |
| Slow or unclear reaction | Weak Zone |
How Institutions Use Supply and Demand Zones
Institutions use supply and demand zones to manage large positions efficiently.
Because banks and hedge funds trade huge volume, they cannot always enter positions instantly without moving the market too aggressively.
This is why price sometimes revisits important zones where institutional activity previously entered.
Professional traders often identify institutional activity through:
- strong momentum
- aggressive reversals
- imbalance candles
- quick price departure
Liquidity Matters
Large institutions prefer entering trades where enough liquidity exists.
This is one reason price often reacts strongly around important supply and demand zones.
Confirmation Still Matters
Even institutions do not guarantee perfect reversals every time.
Professional traders still combine zones with:
- confirmation
- trend direction
- market structure
- risk management
instead of blindly entering every zone.
Entry Strategies Using Supply and Demand Zones
Entry timing is one of the most important parts of supply and demand trading.
Professional traders usually wait for price to react around important zones instead of entering randomly.
Aggressive Entries
Some traders enter immediately when price reaches a supply or demand zone.
This allows:
- earlier entries
- tighter stop losses
- larger reward potential
However, risk is also higher because confirmation is limited.
Confirmation Entries
Many professional traders prefer waiting for confirmation before entering.
They may look for:
- rejection candles
- bullish or bearish engulfing candles
- momentum shifts
- structure breaks
This approach usually reduces false setups.
Trend-Aligned Entries
Supply and demand zones often work better when aligned with the overall trend.
For example:
- buying demand zones during uptrends
- selling supply zones during downtrends
Trading with momentum usually improves probability.
Lower Timeframe Refinement
Many traders identify zones on higher timeframes and refine entries on lower charts.
For example:
- higher timeframe for structure
- lower timeframe for precision entries
Risk Management Matters
Even strong zones can fail.
Professional traders combine supply and demand trading strategy concepts with:
- stop losses
- confirmation
- position sizing
- disciplined risk management
instead of assuming every zone will hold perfectly.
Exit Strategies and Profit Targeting in Supply & Demand Trading
Strong entries are important, but exits matter just as much.
Professional traders usually plan exits before entering the trade.
Opposite Zones as Targets
One common method is using the next supply or demand zone as the target.
For example:
- buy from demand and target supply
- sell from supply and target demand
Partial Profit Taking
Some traders close part of the trade early while leaving the remaining position open.
This helps:
- secure profits
- reduce emotional pressure
- allow participation in larger moves
Trailing Stops
Trailing stops help traders protect profits while allowing trades to continue if momentum remains strong.
Watching Momentum
Professional traders monitor:
- slowing candles
- rejection wicks
- weak momentum
- consolidation
because these signs may suggest the move is losing strength.
Flexibility Matters
Not every trade reaches the full target perfectly.
Professional traders focus more on:
- protecting profits
- following the plan
- managing risk properly
instead of trying to capture every possible pip.
Conclusion
Supply and demand trading is based upon one of the most fundamental concepts in the financial markets – an imbalance between buyers and sellers. Professional traders utilize supply and demand zones as a means to help identify where there have been areas of potential strong institutional activity in the past to assist them in making better entries, managing their risk in a more structured way, and developing a clearer understanding of how the market may behave in the future.
Successful supply and demand trading typically requires:
- patience
- confirmation
- disciplined risk management
- market structure analysis
No zone will work perfectly on every occasion; therefore, experienced traders tend to blend their supply and demand analysis with confirmation and effective trade management rather than just entering into each level blindly.
The reason why many traders have chosen this approach over time is due to the simplified nature of chart analysis using this technique compared to other more complicated methods, as well as the ability to concentrate on actual price action rather than a number of different indicators being used.
FAQ
Supply and demand zones are areas where strong buying or selling previously caused aggressive price movement.
Demand zones reflect strong buying pressure, while supply zones reflect strong selling pressure.
Traders usually identify zones by looking for:
-strong momentum moves
-large candles
-sharp reversals
-fast price departure from consolidation areas
Higher timeframe zones are usually considered more reliable.
Supply and demand zones can be very effective when combined with:
-trend analysis
-confirmation signals
-disciplined risk management
However, no zone guarantees a reversal every time.
Many traders prefer using:
-daily charts
-4-hour charts
-1-hour charts
for identifying major zones, while lower timeframes are often used for entry refinement and confirmation.
Share
Hot topics
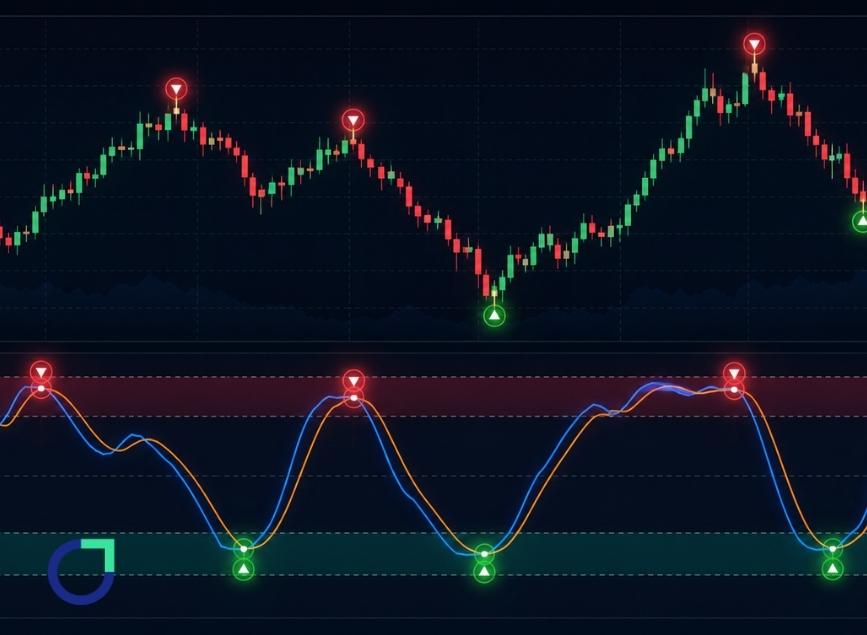
What Is the Stochastic Indicator and How Does It Generate Signals?
Financial markets move through changing momentum patterns that influence how prices rise and fall. In the case of an asset’s upward price movement, trading volume usually decreases before the price...
Read more


Submit comment
Your email address will not be published. Required fields are marked *